SAM Video Background Removal: What Works in 2026 Explained
Yash Thakker
Author
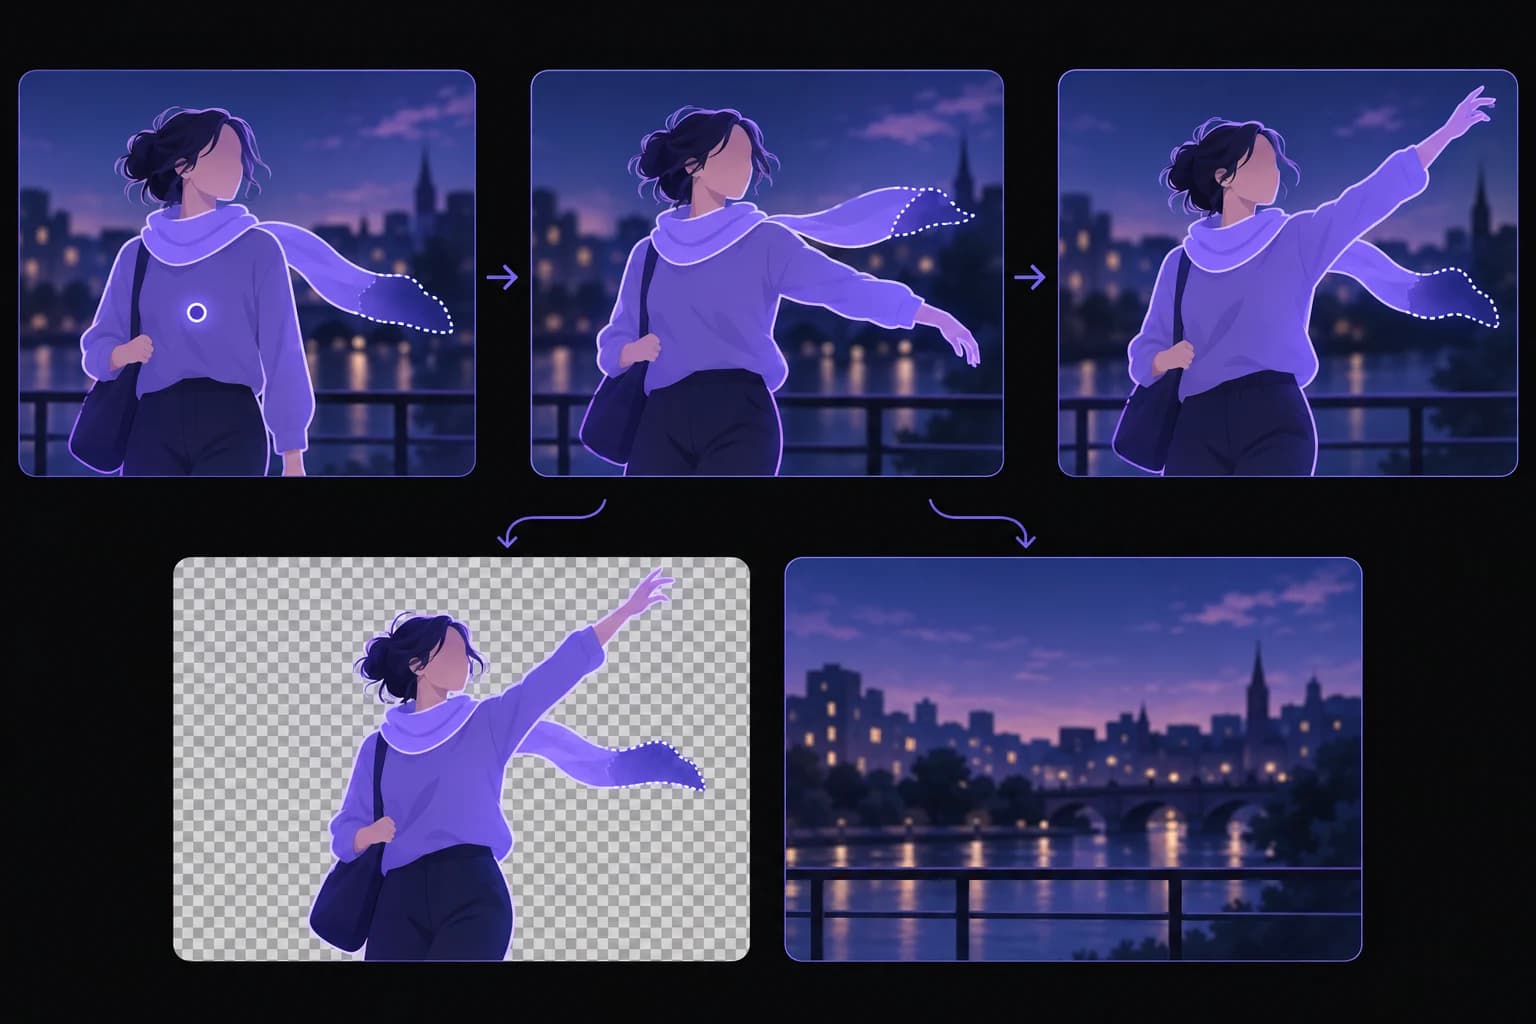
SAM video background removal is often described as if selecting a person were the same task as exporting a polished transparent clip. It is an important step, but it is only one step. A useful result also needs stable boundaries through motion, a sensible treatment of hair and translucent material, correct timing, and a file the next application can actually read.
There is another source of confusion: SAM is a model family, not a single unchanging capability. An explanation of the original image-focused model should not be reused as a description of SAM 2's video workflow. At the same time, a video-capable segmentation model is not automatically a complete editing application or a guarantee of perfect edges.
This guide explains the distinction without pretending that a few lines of untested code form a production pipeline. It covers what prompts and masks do, how to evaluate corrections, why compositing exposes defects, and when a packaged background-removal workflow is the more practical choice for your project.
What is the difference between SAM and SAM 2 for video?
SAM 2 extends promptable segmentation into video with memory that helps track a selected object across frames. That makes it different from treating every video frame as an unrelated image and applying an image segmentation process repeatedly.
Meta describes the memory mechanism and the ability to add corrective prompts in its SAM 2 research overview. The practical implication is that video segmentation has a way to carry information about the selected subject through a sequence rather than starting entirely from scratch at each frame.
That does not mean every task becomes automatic. Someone or something still has to establish which object matters, inspect the result, and decide what to do when the prediction is wrong. A person holding a bag creates an editorial question: should the foreground include the person, the bag, both, or only a particular part? A model's object selection and your intended composition may not be identical.
The word background can also hide several tasks. Keeping a presenter while discarding a room differs from removing one object and inventing what was behind it. The first can use a foreground mask and a replacement layer. The second requires reconstruction or generation of missing scene content.
Before choosing a model or tool, write the desired output in plain terms. For example, keep the speaker and microphone, replace the office with a still image, and retain the original narration. That statement makes it easier to identify which parts segmentation can solve and which belong to the rest of the editing pipeline.
What does a segmentation mask actually give you?
A segmentation mask tells the pipeline which image regions belong to the selected object. It is a control signal for later processing, not necessarily a ready-to-use transparent video or a physically accurate description of every edge.
Imagine placing a presenter over a blue background. The mask determines which source pixels remain visible and which reveal the new blue layer. If the mask includes part of the old wall, that wall appears in the composite. If it excludes a finger, the blue background cuts through the hand. The defect becomes obvious because the new scene differs from the old one.
A clean-looking mask visualization can conceal those problems. Bright overlays help show selection coverage, but they can make thin gaps or edge contamination harder to notice. Inspect the actual composition as well as the mask. Use a contrasting test background so the evaluation does not accidentally hide the old scene's color.
A mask is not the final deliverable
The complete workflow still needs the original frames, timing, audio, and a defined way to use the mask. It may produce a flattened video with a new background, a foreground and mask pair, or a transparent asset for another editor. Each route has different compatibility requirements.
Do not promise an alpha-capable output merely because the model predicts a foreground region. File creation and encoding happen elsewhere in the system. If your goal is an editing asset, our transparent video guide explains the handoff questions to resolve before processing a full project.
Why are hair and translucent edges harder than solid objects?
Hair, motion blur, and translucent material do not always have a single clean boundary between subject and background. A pixel can contain a mixture of both, which makes these areas more demanding than the outline of a solid object against a contrasting wall.
A binary decision can be adequate for a rough selection, but it may be too crude for a close-up composite. Cutting aggressively can remove wisps of hair; keeping too much can retain a halo of the original background. Blurring the entire edge may soften the defect while also making the person look unnaturally smeared.
Translucent fabric introduces another issue. The old background may be visible through the material in the original recording. Replacing the scene convincingly requires more than preserving the outer silhouette: the visible mixture of fabric and background needs to make sense against the new layer.
Use these observations to set realistic acceptance criteria. A small presenter overlay can tolerate different imperfections from a close-up fashion shot. Evaluate at the intended display size, then inspect a larger view to understand any visible problem. Avoid rejecting a useful small overlay for an imperfection no viewer can see, but do not approve a prominent portrait based only on a tiny thumbnail.
If fine edges dominate the project, budget for matting or manual refinement in a suitable editor. Our hair and background-removal guide discusses this boundary problem in practical terms. A segmentation model provides a starting point; the required finish depends on the footage and how prominently it will be shown.
How should you prompt and correct a video mask?
Prompt the intended subject clearly, review the propagated result, and add corrections where the selection stops matching your intent. The useful unit of review is the sequence around the problem, not only the frame where you add a click.
Start on a frame where the subject is visible and distinguishable from nearby objects. If the person is already partly hidden behind another person, choosing the intended target may be harder to interpret. Give the workflow a clear example before evaluating how it handles occlusion, rotation, or rapid movement.
Meta's official implementation provides a video predictor that maintains inference state and manages user interactions; see the SAM 2 video predictor source. Use the corresponding official examples for your installed version instead of copying an unrelated image-only snippet and assuming the same calls apply.
After a correction, review what happens before and after that frame. Did the intended sleeve return? Did the correction accidentally include the chair? Does the selection stay on the same person when two people cross? A local improvement may expose a different error elsewhere.
Keep a small record of difficult points in the clip. Marking the first occlusion, fast turn, and subject reappearance makes repeat review more efficient. If the workflow requires constant intervention on ordinary frames, consider whether the source is unsuitable or whether another tool provides a better balance of control and effort for this particular job.
How do you check temporal consistency?
Check temporal consistency by watching whether the selected subject and its edges remain stable through time. A sequence of individually plausible masks can still produce a distracting video if the boundary expands, contracts, or jumps between frames.
Play the full result at normal speed first. This reveals flicker and identity changes more naturally than examining isolated images. Then inspect the frames around each visible defect to understand whether it comes from an incorrect region, motion blur, compression, or a change in the source lighting.
Include difficult transitions in the test: a hand crossing the face, a person turning sideways, an object moving out of view, and a subject returning after an occlusion. These are proposed evaluation cases, not a benchmark result or a promise that any model will pass them. Choose cases that resemble the footage you actually edit.
Meta explicitly notes limits to temporal smoothness in its SAM 2 technical discussion. That is a useful reminder to test stability rather than translating a research capability into a universal quality guarantee.
Also inspect camera cuts. A scene change is not simply another small movement of the same object. Split or handle shots deliberately so the workflow does not carry an inappropriate selection across unrelated scenes. Keep your original timestamps and audio alignment intact while doing so. A visually stable cutout is only useful if it remains synchronized with the rest of the edit.
What belongs in a complete background-removal pipeline?
A complete pipeline handles input media, subject selection, mask review, edge treatment, composition, audio, and export. Segmentation is the central decision about what remains visible, but the surrounding steps determine whether the result is usable.
| Stage | Question it must answer | Example failure to catch |
|---|---|---|
| Decode | Are the frames and timing correct? | Incorrect rotation or frame timing |
| Select | Is the intended subject included? | A held object is excluded |
| Track | Does the selection stay consistent? | The mask jumps to another person |
| Refine | Are important boundaries usable? | Hair retains a bright halo |
| Composite | Does the new scene fit? | Feet float above the replacement floor |
| Export | Can the next application use it? | Transparency is flattened unexpectedly |
Define the handoff between these stages. If one process resizes frames while another assumes the original dimensions, the mask can become misaligned. If an editor changes frame rate after the mask sequence is produced, timing may need deliberate handling. These are ordinary integration concerns even when the model itself behaves correctly.
Preserve audio separately when the segmentation workflow processes images rather than a complete media timeline. After recombining, play the beginning, middle, and end to check synchronization. Keep the source recording available so a mismatch can be investigated.
For a finished replacement background, export a standard playback file appropriate to the destination. For a transparent intermediate, test it in the receiving editor over a contrasting layer. The final acceptance check should use the actual file the next person receives, not just an internal preview of the processing stage.
When is a packaged tool more practical than running a model?
A packaged tool is often more practical when your objective is to finish a small number of videos and you do not need to control the model pipeline. Running a model becomes more attractive when the project needs custom selection behavior, integration, or a repeatable technical experiment.
The tradeoff is not simply free versus paid. A local or hosted model workflow can involve environment setup, compute, dependency management, output encoding, and a correction interface. A web application can reduce that setup while giving you less control over the underlying implementation. Compare the work you actually need to do.
BGRemover.video provides a video background removal workflow for creators who want to upload a clip and work with the available background and export options. This article does not establish which segmentation model the product uses. Research descriptions should not be presented as an undocumented product architecture claim.
If you evaluate the product, use the same difficult clip you would use for a model experiment. Inspect the downloaded result, check the export requirement, and confirm that it works in your editor. If you evaluate a custom pipeline, measure its end-to-end output rather than only the speed of the segmentation stage.
For teams, include maintenance in the decision. A working notebook owned by one person may not be a dependable production workflow for everyone else. Document inputs, versions, correction steps, and export settings so the result can be reproduced when the original author is unavailable.
What should you do before committing a whole project?
Complete one representative clip from original input to final destination before committing the entire project. That single end-to-end test exposes more practical problems than a large batch of masks that has never been composited or exported.
Choose footage with the hardest motion and material you expect to encounter. Define what must remain visible, how much manual correction is acceptable, and what file the receiving application needs. Keep those criteria simple enough that another reviewer can make the same decision.
Inspect the model output and the final composition separately. A correct region can still have poor edge appearance, and a good-looking preview can still produce an incompatible file. Check the actual download, its timing, and its audio before treating the process as complete. Keep the original safe and preserve enough notes to repeat the test later.
If you want to focus on the edit rather than model setup, try BGRemover.video with that representative clip. If you need a custom SAM workflow, use the official implementation and build the remaining media stages deliberately. In either case, the standard is the same: a subject that stays intact and a result that works where you intend to use it.
Frequently asked questions
Can SAM remove a video background?
A SAM-based pipeline can create subject masks that are used for background removal. SAM 2 includes video-oriented memory and prompting, but decoding, edge treatment, compositing, audio, and export remain parts of the surrounding workflow.
Is SAM 2 the same as the original SAM?
No. SAM 2 extends promptable segmentation to video using a memory mechanism. Do not apply an image-only description of the original model to every later member of the model family.
Does a segmentation mask contain perfect transparency?
No. A mask identifies the region of the selected object, while a useful alpha matte must also handle boundaries such as hair, blur, and translucent material. Those are related but different tasks.
Can I correct a bad SAM 2 mask?
The official video workflow supports additional prompts to correct predictions. Review the surrounding frames after a correction because a better mask on one frame does not automatically establish a stable result for the whole clip.
Does BGRemover.video use SAM 2?
This article does not establish which model runs inside BGRemover.video. It explains the research and the workflow separately; judge the product by its available controls and the exported result from your footage.